Island Batiks Rain Ripples Part 1
Since it's April, Island Batik's challenge for it's Ambassadors is April Showers. We got a list of all sorts of different "spring" images to pick from to use in our quilts. I was going to do a bug wearing rain boots. I even made the drawings, but decided it wasn't quite what I wanted in the end. The modern quilt movement bug has bitten me and I knew raindrops would make an interesting modern quilt.

So then I started thinking about raindrops and the shapes they make when they hit a puddle of water. I decided to use a rainbow of colors because rain always make me hope for rainbows. Two of the fabrics are from Island Batik's Fire Island line, two are from their basic batiks, and two are from their Florida Oranges line.
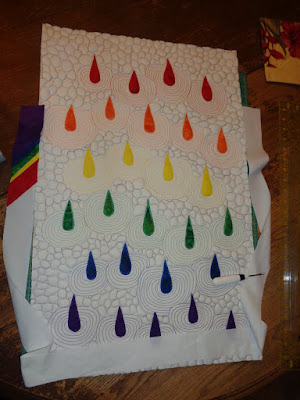
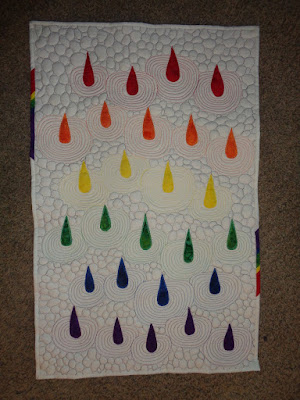
I cut out a bunch of raindrops and laid them out in a rainbow. Then the fun part: quilting it! I decided to call the quilt Rain Ripples since that is what I'm trying to emulate.
I was lucky enough to receive some wonderful variegated Fantastico thread from Superior Threads as part of being an Island Batik Ambassador. One thing I absolutely love about Superior's variegated threads is how often they change color. It's about every inch or two. Many variegated threads only change every 8-12 inches. This is one reason I find Superior's variegated threads to be well, Superior! I also really like that the labels on the threads tell you which needle will work best. What a fantastic idea that makes it easy for quilters to remember.
Here are the colors I used to quilt Rain Ripples:


Purple done! I decided that instead of overlapping the ripples like would actually happen in real life, I would simply have the rings stop when they hit each other. You can see this clearly in the picture below.


Once I'd started quilting the ripples in my beautiful varigated thread, I had to think about what I was going to do with the background. Originally I was going to use a white thread, but changed my mind and decided on a light gray thread I also received as an Ambassador, Superior's Masterpiece Thread. This thread is a 50 weight 3-ply cotton that is great for quilting and piecing. I've never used it before and found it fantastic and easy to work with. I also liked that the ripples have a sheen (polyester thread) and the background quilting won't (cotton thread). It's a nice contrast.


Ready for background quilting. One thing I'm enjoying about working on small projects for my blog is using all sorts of different combinations of batting to see what I like the best and might want to use in my competition pieces. For this quilt I used two layers of Hobbs Wool batting. It was REALLY fluffy, almost too much. I love puff, but this quilt had so much that quilting those pebbles was a challenge because the fabric was so puffy it sometimes left puckers or tucks in the top if I wasn't spreading it apart really tightly with my hands while quilting.

Here's the quilting all finished except for the binding. I have something special planned for that. Come back Saturday to check it out! And don't forget to join my Machine Applique Adventures Facebook group!

Rain Ripples - Modern Binding
I was at a trunk show by the lovely and amazing Karen McTavish a few months ago where she showed the progression of her quilts from traditional to modern. Since I am new to the modern quilt movement, I found her comments about it quite interesting and informative. One comment that piqued my curiosity and inspiration was that modern quilters were adding small pieces of color to their bindings. I knew I had to try it.
So when my Rain Ripples project for Island Batik Ambassadors turned out modern, I knew it was time to try something different. First, I cut two long white strips of binding and some small pieces to make a rainbow. (Click here to see the first post)
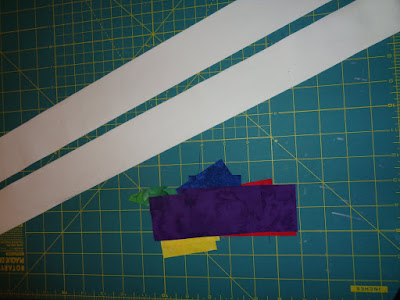
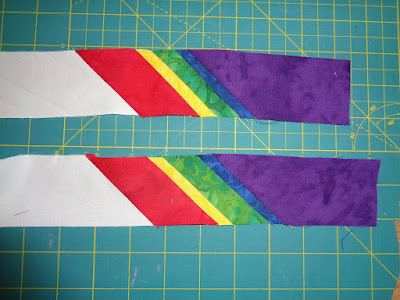
I have very little fabric left, so some of the stripes were very skinny. However, I felt that fit with the scale of the pieces in the quilt so it worked out okay. I was also out of orange, so that color (alas, one of my favorites!) was left out.

Next of course was to iron the binding in half. At least it was a small quilt!

Again I laid out the binding and took a look. I realized that the red was towards the middle of the quilt on both sides. Oops. Since this quilt is a learning process I decided to leave the binding this way as a reminder to myself when I decide to try it again.
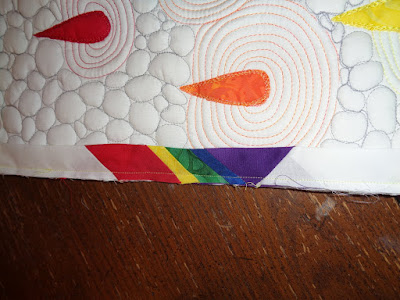
Another oops happened when I sewed together the ends of the binding. The angle of the rainbow was not parallel at both ends. OOPS. Again, I left it as a reminder for next time. I also wondered what it would really look like once it was only down to a quarter inch. I knew the mistakes wouldn't show up as much as I thought they would.

Above you can see the quilt before turning the binding over. Below you can see the quilt after turning the binding over. I was right, once it's skinny it's not too noticeable that I made so many mistakes! I also realized that I should've pressed all the rainbow seams OPEN instead of to one side. This binding was truly a learning experience!
HOWEVER, I love the outcome. The little splash of color in the binding is too fun. I definitely have to try this again! Please come join me in my Machine Applique Adventures Facebook Group to get in on all the fun.
So when my Rain Ripples project for Island Batik Ambassadors turned out modern, I knew it was time to try something different. First, I cut two long white strips of binding and some small pieces to make a rainbow. (Click here to see the first post)


I have very little fabric left, so some of the stripes were very skinny. However, I felt that fit with the scale of the pieces in the quilt so it worked out okay. I was also out of orange, so that color (alas, one of my favorites!) was left out.

In order to figure out where I needed to connect the white piece to the second piece of rainbow, I laid the binding out around the quilt and marked where I wanted the second rainbow to start. I then cut the fabric off at this point and connected the two pieces of binding together.

Next of course was to iron the binding in half. At least it was a small quilt!

Again I laid out the binding and took a look. I realized that the red was towards the middle of the quilt on both sides. Oops. Since this quilt is a learning process I decided to leave the binding this way as a reminder to myself when I decide to try it again.

Another oops happened when I sewed together the ends of the binding. The angle of the rainbow was not parallel at both ends. OOPS. Again, I left it as a reminder for next time. I also wondered what it would really look like once it was only down to a quarter inch. I knew the mistakes wouldn't show up as much as I thought they would.

Above you can see the quilt before turning the binding over. Below you can see the quilt after turning the binding over. I was right, once it's skinny it's not too noticeable that I made so many mistakes! I also realized that I should've pressed all the rainbow seams OPEN instead of to one side. This binding was truly a learning experience!

HOWEVER, I love the outcome. The little splash of color in the binding is too fun. I definitely have to try this again! Please come join me in my Machine Applique Adventures Facebook Group to get in on all the fun.
No comments:
Post a Comment